What to Do If Your Flashlight Gets Wet: Essential Steps for Recovery

Accidentally dropped your Helius flashlight in water? Don’t panic! Acting quickly can save it from permanent damage. The first thing you need to do is turn it off and take the battery out. Leaving it on could worsen the liquid damage. With the right steps, recovery is possible—even for devices like a wet flash drive or wet phone. Water damage doesn’t have to mean the end of your Helius flashlight. Follow these important steps to fix it before it’s too late.
Key Takeaways
Switch off your flashlight right away if it gets wet. This stops more damage from happening.
Take out the batteries quickly to prevent rust. Clean the battery area well before letting it dry.
Let the flashlight air dry in a warm, safe spot. Don’t use things like hair dryers, as they might harm it more.
Immediate Steps to Take
Turn Off the Flashlight Immediately
The moment your flashlight gets wet, your first instinct might be to check if it still works. Don’t do that! Don’t turn it on, as this could cause more damage. Instead, turn it off immediately if it’s still on. This step is crucial to prevent short circuits or further water damage. Acting quickly can make all the difference in the recovery process.
Remove the Batteries and Components
Once the flashlight is off, take the battery out right away. Leaving it inside could lead to corrosion or even leakage, which can harm the flashlight further. Follow these steps to safely remove the batteries:
Wear gloves to protect your hands.
Carefully take out the batteries, avoiding contact with your skin or eyes.
If the batteries are leaking, place them in a safe container for disposal.
Use a damp paper towel or cotton swab to clean the battery compartment.
Check for any corrosion on the battery contacts and clean it if necessary.
If you notice corrosion, mix baking soda with water to create a paste. Apply it to the corroded areas and scrub gently with an old toothbrush or cotton swab. Wipe everything down with a damp cloth and let it dry completely before reinserting new batteries.
Inspect for Water or Visible Damage
After removing the batteries, take a closer look at your flashlight. Rotate it and gently shake it to see if any liquid drains out. Check the battery compartment and other openings for signs of water. If possible, disassemble the flashlight to inspect for internal water damage. Look for corrosion, discoloration, or any residue left by the water. These signs will help you determine the extent of the damage and guide your next steps.
Remember, the faster you act, the better your chances of saving your flashlight. Whether it’s a flashlight or even a wet flash drive, quick action is key to recovery.
Effective Drying Methods
Air Drying in a Warm, Safe Location
Once you've removed the batteries and inspected your flashlight, it's time to dry it out. Air drying is one of the safest and most effective methods. Find a warm, dry spot in your home, like near a sunny window or a well-ventilated area. Place the flashlight on a clean towel and leave it there for several hours or even overnight. Rotate it occasionally to ensure all sides dry evenly. Avoid rushing this process—letting the flashlight air dry thoroughly reduces the risk of further water damage.
Tip: If you're drying out a wet flash drive or another small device, this method works well too. Just make sure to keep it away from direct heat sources.
Using Silica Gel or Rice for Moisture Absorption
If you're dealing with stubborn moisture, silica gel packets or uncooked rice can help. These materials are excellent at absorbing liquid from small spaces. Place your flashlight in a sealed container with a few silica gel packets or a cup of rice. Let it sit for 24-48 hours. This method works wonders for hard-to-reach areas inside the flashlight. Remember to check periodically and replace the rice or silica gel if it becomes damp.
Note: This technique is also a popular answer to how to dry your smartphone or dry out a wet flash drive. It's a simple yet effective solution for electronic devices.
Cleaning and Drying the Battery Compartment
The battery compartment often traps water, so you need to clean it out thoroughly. Start by creating a cleaning solution with equal parts vinegar or lemon juice and water. Dip a cotton swab into the mixture and gently scrub the battery contacts. This helps dissolve any corrosion caused by water exposure. Wipe the area with a damp cloth to remove residue, then dry it off completely with a soft towel. Let the compartment air dry for a few hours before reassembling the flashlight.
Pro Tip: Dry it as much as you can before inserting new batteries. This step is crucial to avoid further damage.
By following these methods, you can recover your flashlight and prevent long-term water damage. Patience and proper care are key to ensuring your device works like new again.
What to Avoid When Drying
Avoid Heat Sources Like Hair Dryers
When drying your flashlight, resist the urge to grab a hair dryer or place it near a heater. High heat can warp plastic components or damage delicate internal parts. Even if you’re in a hurry, using heat sources can do more harm than good. Instead, stick to safer methods like air drying or using silica gel. These options may take longer, but they’re much gentler on your flashlight. Remember, patience is key when dealing with water damage.
Tip: If you’ve ever dealt with a washed USB flash drive, you know that slow and steady drying methods work best for electronics.
Do Not Reassemble While Wet
Reassembling your flashlight before it’s completely dry is a big no-no. Even a small amount of trapped moisture can lead to serious problems. Here’s why you should wait:
Moisture buildup can harm internal components.
Trapped water increases the risk of electrical shorts.
Allowing parts to fully dry prevents long-term damage.
Take your time and let every piece air dry thoroughly. This step is crucial to avoid turning a minor issue into a major one.
Avoid Shaking the Flashlight Aggressively
It might seem like shaking the flashlight will help remove water, but it’s actually a bad idea. Shaking can force liquid deeper into the device, making the damage worse. Instead, gently tilt the flashlight to let any remaining water drain out. A soft towel can also help absorb excess moisture without pushing it further inside. Handle your flashlight carefully to minimize the risk of liquid damage.
By avoiding these common mistakes, you’ll give your flashlight the best chance of recovery. Whether it’s a flashlight or a wet flash drive, proper care makes all the difference.
Testing the Flashlight After Drying
Reassemble the Flashlight Carefully
Once everything is completely dry, it’s time to put your flashlight back together. Start by gathering all the parts you removed earlier. Check each piece one last time to ensure there’s no lingering water or moisture. If you spot any, give it a quick wipe with a soft, dry cloth.
When reassembling, handle the components gently. Align the parts properly to avoid damaging the threads or seals. If your flashlight has rubber gaskets or O-rings, inspect them for wear or damage. These small parts help protect against future water damage, so they need to be in good shape.
Tip: If you’re unsure about how to reassemble your flashlight, refer to the user manual or check the manufacturer’s website for guidance.
Insert Fresh Batteries
Now that your flashlight is reassembled, grab a set of fresh batteries. Avoid using the old ones, especially if they were exposed to water. Damaged batteries can leak or cause further issues. Insert the new batteries according to the polarity markings inside the compartment. Double-check that they’re seated correctly before closing the battery cover.
Fresh batteries not only ensure proper functionality but also help you avoid unnecessary troubleshooting later. This step is crucial for a successful recovery.
Test the Flashlight in a Safe Environment
Before you declare your flashlight fully recovered, test it in a safe and controlled environment. Turn it on and observe how it functions. Does the light beam look normal? Are there any flickering or unusual noises? If everything seems fine, your flashlight is ready for use again.
If it doesn’t work as expected, don’t panic. Sometimes, water damage can affect internal components in ways that aren’t immediately visible. In such cases, you might need to consult a professional or consider replacing the flashlight.
Note: Testing in a safe environment is essential. Avoid using the flashlight near flammable liquids or in hazardous conditions until you’re sure it’s working properly.
By following these steps, you can recover data from your flashlight’s performance and ensure it’s back in working order. Whether it’s a flashlight, a wet phone, or even a wet flash drive, patience and proper care can often fix the issue.
When to Seek Professional Help
Signs the Flashlight May Be Beyond Repair
Sometimes, despite your best efforts, a flashlight may not recover from water damage. You might notice persistent issues like flickering light, unresponsive buttons, or a complete failure to turn on. Corrosion on internal components or a strong, unpleasant smell from the battery compartment are also red flags. If the flashlight feels unusually warm when you try to use it, that’s another sign of internal damage. These problems often indicate that the water has caused irreversible harm.
Tip: If you’ve experienced similar issues with a water-damaged iPhone or wet phone, you know how tricky it can be to fix electronics once the internal components are compromised.
Contacting the Manufacturer or Repair Specialist
If your flashlight shows signs of severe damage, reaching out to the manufacturer or a repair specialist is a smart move. Many manufacturers offer repair services or replacement options, especially if your flashlight is still under warranty. Check the user manual or the company’s website for contact details. A professional can assess the extent of the damage and determine if repairs are possible. This step can save you time and effort compared to attempting a DIY fix.
Note: Data recovery professionals often handle similar cases with wet flash drives or water-damaged iPhones. They have the tools and expertise to deal with liquid damage effectively.
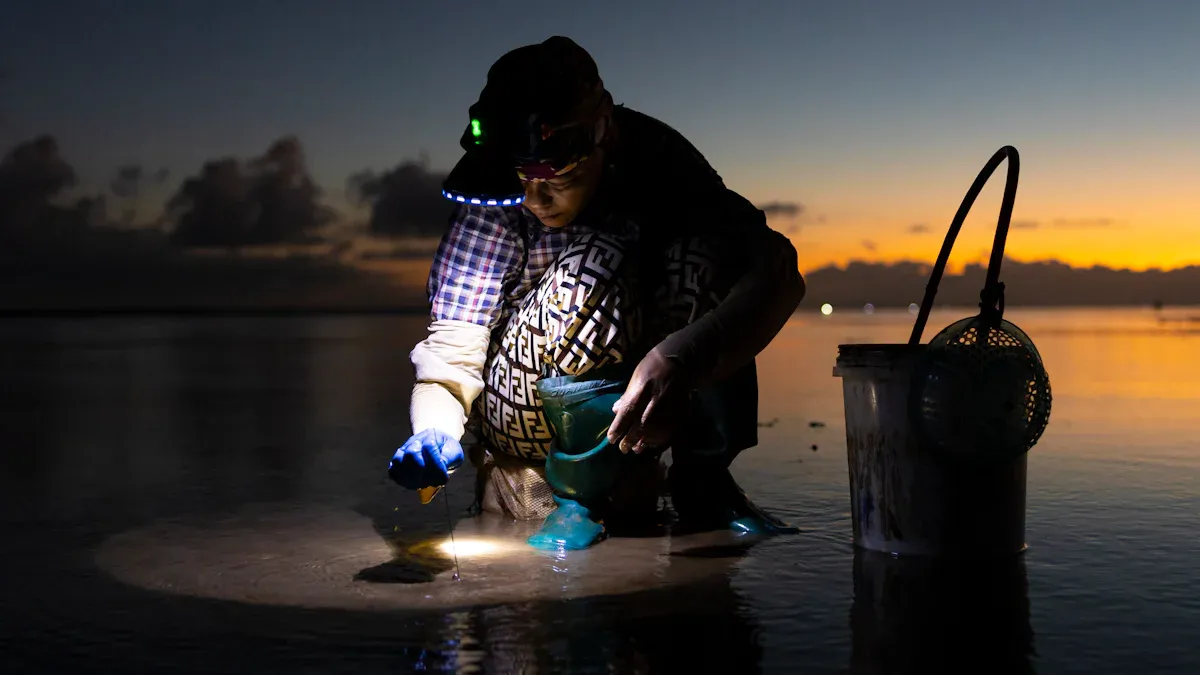
Considering Replacement Options Like a Helius Flashlight
If repairs aren’t feasible, it might be time to consider a replacement. A waterproof model like the Helius flashlight is an excellent choice. Its robust construction ensures durability, while its waterproof design protects internal components from moisture. This makes it ideal for outdoor activities where exposure to water is common. Plus, with an impressive 800-lumen output, it provides superior visibility in any condition.
A Helius flashlight isn’t just a replacement—it’s an upgrade. It offers reliable performance in wet conditions, ensuring you’re prepared for unexpected rain or splashes. Investing in a waterproof flashlight can save you from future headaches and extend the lifespan of your gear.
Pro Tip: Whether you’re replacing a flashlight or trying to fix a wet smartphone, choosing waterproof devices can prevent water damage and make recovery easier.
Recovering your flashlight from water damage is easier than you think. Act quickly, dry it thoroughly, and test it carefully. Most flashlights, like the Helius flashlight, can be saved with proper care. To prevent future issues:
Remove batteries when not in use.
Store in a cool, dry place.
Use a protective case.
Waterproof flashlights, such as the Helius flashlight, are reliable in all weather conditions. They’re durable, safe, and perfect for emergencies. Investing in one ensures your flashlight stays functional, even in wet situations.
Tip: Regularly clean and inspect your flashlight to avoid water damage and extend its lifespan.
FAQ
What should you do if your flashlight falls into saltwater?
Rinse it with fresh water immediately to remove salt. Salt can corrode internal parts quickly. Then, follow the drying steps outlined earlier for proper recovery.
Can you use a waterproof flashlight underwater?
Yes, but only if it’s rated for underwater use. Check the IP rating on your flashlight. Some models handle water exposure better than others.
How can you prevent water damage in the future?
Store your flashlight in a waterproof case. Choose a model designed for wet conditions. These precautions keep your flashlight safe during unexpected splashes or rain.
See Also
Key Strategies for Keeping Your Flashlight in Top Shape
A Comprehensive Process for Flashlight Cleaning Explained
Your Complete Resource for Flashlight Care and Upkeep
Designed for Longevity: Our Emergency Flashlight's Resilience
Selecting the Ideal Emergency Flashlight for Every Homeowner
