How to Use a Flashlight for DIY Projects and Home Improvement
When you're tackling a DIY project or fixing something at home, a flashlight can be your best friend. It helps you see clearly, especially when you're working in dim or tight spaces. A good flashlight doesn’t just make your job easier—it keeps you safe by reducing the chances of accidents.
That’s why having a reliable option like the helius flashlight is a game-changer. Its powerful 20000 lumens output ensures exceptional brightness, while the USB charging feature makes it super convenient. Plus, its waterproof design and durable construction mean it can handle drops and rainy conditions without breaking a sweat. Whether you're lighting up a large area or focusing on small details, this flashlight has you covered.
With the right flashlight, you can work smarter, safer, and faster. Why settle for less when the helius flashlight offers everything you need?
Key Takeaways
A good flashlight, like the Helius flashlight, helps you see better and stay safe during DIY projects. It makes work easier and lowers the chance of accidents.
Pick a flashlight with brightness settings you can change. This helps you focus light on small tasks like soldering or painting, so you can work more carefully.
Keep a flashlight in a place you can reach quickly. This is important during power outages to move around safely and avoid getting hurt.
Store your flashlights in one spot to find them fast. Check them often to make sure they still work.
Add features to your flashlight, like glow-in-the-dark paint or magnets. These make it easier to use and more helpful.
Practical Uses of a Flashlight in DIY Projects
Focused Lighting for Detailed Work
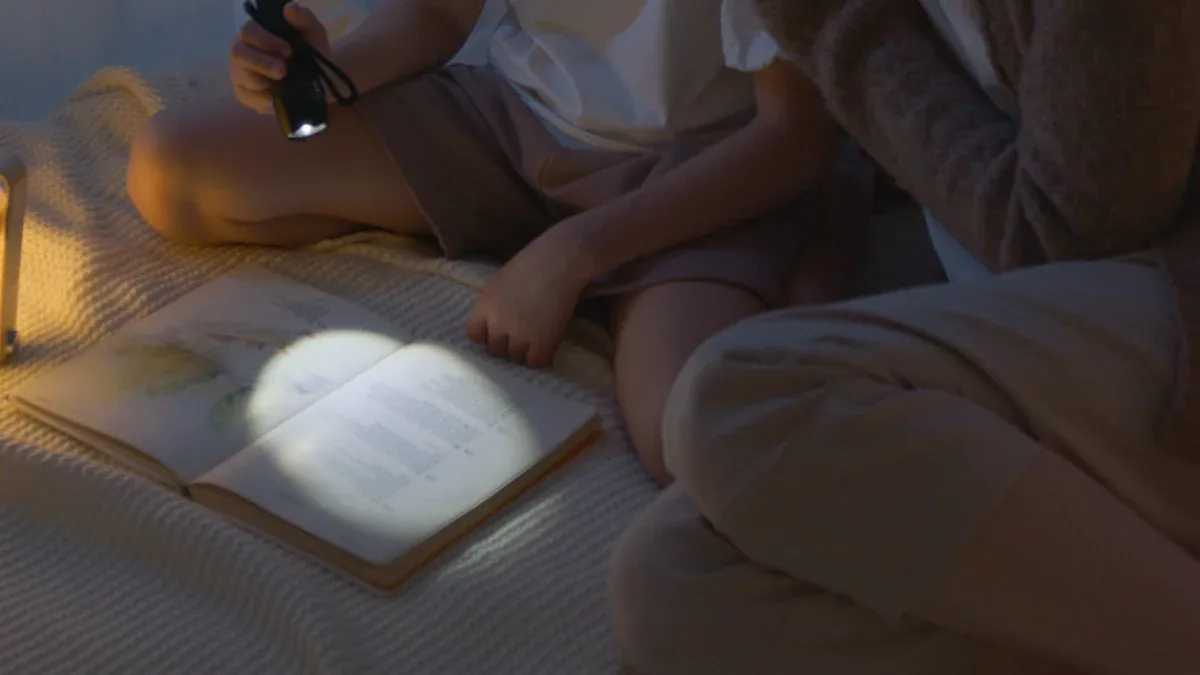
When you're working on intricate DIY tasks, proper lighting makes all the difference. A flashlight provides a concentrated beam of light, helping you focus on small details. Whether you're soldering wires, painting fine lines, or assembling tiny parts, the extra brightness ensures precision. You won't have to strain your eyes or guess where to place your tools.
Tip: Use a flashlight with adjustable brightness settings. This way, you can control the intensity of light based on your needs.
A reliable flashlight, like the helius flashlight, offers consistent performance. Its focused beam helps you achieve professional results, even in low-light conditions.
Illuminating Hard-to-Reach Areas
Ever tried fixing something in a cramped corner or under a sink? It’s frustrating when you can’t see what you’re doing. A flashlight solves this problem by lighting up those tricky spots. Its compact design allows you to maneuver it into tight spaces effortlessly.
For example, you can use it to inspect pipes, check behind appliances, or even peek into your car’s engine. Some flashlights come with magnetic bases or hooks, so you can keep your hands free while working. This makes your job easier and more efficient.
Enhancing Safety During Power Outages
Power outages can happen unexpectedly, leaving you in the dark. A flashlight becomes your go-to tool for staying safe during these moments. It helps you navigate your home without tripping over obstacles or bumping into furniture.
Note: Always keep a flashlight in an accessible spot, like your bedside table or kitchen drawer.
Having a flashlight ready ensures your safety and peace of mind. It’s especially useful if you need to check your circuit breaker or assist others during an emergency.
Creative Storage and Accessibility Solutions
Building a Flashlight Holder
Keeping your flashlight within reach can save you time and effort during DIY projects. Building a flashlight holder is a simple yet effective way to ensure accessibility. You can create a custom holder using basic materials like wood, metal brackets, or even 3D-printed designs. Attach it to a wall, workbench, or any convenient spot in your workspace.
If you’re looking for innovative designs, consider these options:
The Fenix ALW-01 Wrist Flashlight Holder lets you attach a flashlight to your wrist. It provides 360° directional lighting while keeping your hands free.
The Fenix ALD-05 Helmet Flashlight Holder secures a flashlight to your helmet. It’s perfect for tasks like climbing or biking, where safety and stability are crucial.
The Fenix ALP-20 Leather Flashlight Holster offers quick access with its open-top design. It’s ideal for fast-paced environments.
These designs not only improve accessibility but also make your DIY projects more efficient.
Using Glow-in-the-Dark Paint or Tape
Ever struggled to find your flashlight in the dark? Glow-in-the-dark paint or tape can solve this problem. Apply it to the handle or edges of your flashlight. This simple trick makes it easy to locate, even during power outages.
You can also use glow-in-the-dark tape to mark the storage area for your flashlight. Whether it’s a drawer, a wall-mounted holder, or a toolbox, this ensures you’ll always know where to look.
Organizing Flashlights for Quick Access
Proper organization is key to being prepared for emergencies. Here are some strategies to keep your flashlights accessible:
Use a centralized storage system, like a multi-layer display rack, to store all your lighting tools in one place.
Sort flashlights by function and store them on separate levels. For example, keep heavy-duty flashlights on one shelf and compact ones on another.
Perform regular checks to ensure batteries are charged and flashlights are functional.
By organizing your flashlights, you’ll save time and reduce stress when you need them most.
How to Make a Flashlight for DIY Projects
Step-by-Step Guide to Building a Flashlight
Building your own flashlight can be a fun and rewarding project. It’s easier than you might think! Here’s a simple step-by-step guide to help you make a flashlight:
Preparation: Start by cutting a copper pipe to the desired length for your flashlight body. Solder a coupling to one end, then drill small holes for the wires. Prepare the wires and cut plastic circles to fit inside the pipe.
Final Assembly: Glue the LED to the plastic circle and solder the connections. Insert the batteries into the flashlight body, ensuring they’re aligned correctly. Test the flashlight to make sure it works.
Decoration: Add a personal touch by wrapping the flashlight body with decorative tape or painting it. Secure the lens with heatshrink for a polished finish.
Tip: Wear safety glasses and gloves while working to protect yourself from accidental burns or cuts.
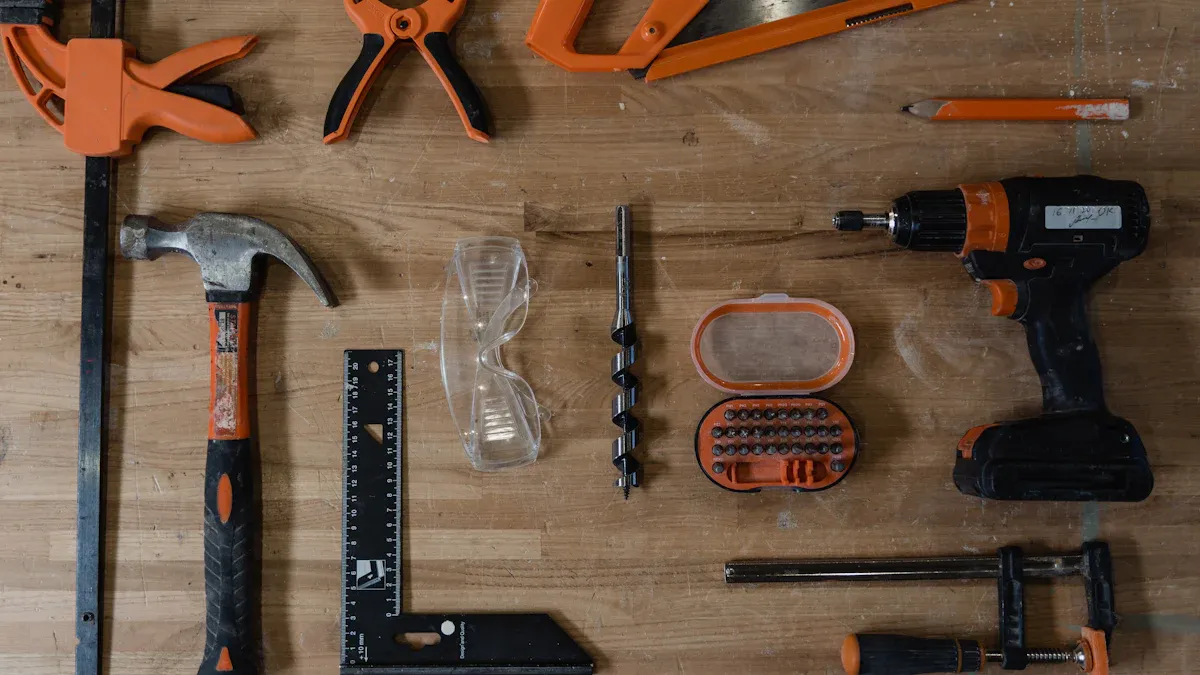
Materials and Tools Needed
Before you start, gather all the materials and tools you’ll need. Here’s a handy table to keep you organized:
Materials | Tools |
|---|---|
Tubing (pipe) cutter | |
Surface-mount LED | Butane torch |
Alkaline AA batteries | Metal punch |
Heatshrink | Soldering iron |
Wire | Heat gun (or hairdryer) |
Scrap plastic | Hammer |
| Decorative elements | Allen wrench | | | Scissors | | | Exacto knife | | | Pliers | | | Safety glasses | | | Heat resistant glove or vice |
Having everything ready before you begin will save you time and make the project smoother.
Tips for Customizing Your Flashlight
Once you’ve built your flashlight, why not make it uniquely yours? Here are some ideas to customize it:
Use glow-in-the-dark paint on the flashlight body to make it easy to find in the dark.
Add a magnetic base so you can attach it to metal surfaces while working.
Experiment with different LED colors to create a flashlight that matches your style.
Customizing your flashlight not only makes it more functional but also adds a personal touch to your project.
Customizing and Enhancing Flashlights

Modifying Flashlights for Specific Tasks
Sometimes, a standard flashlight just doesn’t cut it for certain projects. Modifying your flashlight can make it more suitable for specific tasks. For example, you can attach a diffuser to soften the light, which is great for painting or photography. If you’re working in tight spaces, consider adding a flexible neck attachment. This lets you direct the beam exactly where you need it without holding the flashlight.
Another handy modification is creating a flashlight mounting system. You can attach your flashlight to a helmet, bike, or even a tripod. This keeps your hands free and makes your work more efficient. These small tweaks can transform your flashlight into a versatile tool tailored to your needs.
Tip: Use Velcro straps or magnetic mounts for quick and easy flashlight mounting solutions.
Upgrading Flashlight Features
Upgrading your flashlight can take its performance to the next level. Modern advancements in LED technology have made flashlights brighter and more efficient. High-output LEDs now produce over 10,000 lumens, giving you incredible brightness. Rechargeable lithium-ion batteries are another game-changer. They last longer, charge faster, and are more eco-friendly than traditional batteries.
Some flashlights even come with smart features like Bluetooth connectivity. This allows you to control the brightness or set timers remotely. You can also upgrade to high CRI (Color Rendering Index) LEDs, which improve visibility by making colors appear more natural. These upgrades not only enhance functionality but also make your flashlight more reliable for demanding tasks.
Combining Flashlights with Other Tools
Why stop at just a flashlight when you can combine it with other tools? Multi-functional flashlights are becoming increasingly popular. For instance, some models include built-in screwdrivers, knives, or even bottle openers. These all-in-one tools are perfect for camping trips or quick fixes around the house.
You can also pair your flashlight with a laser pointer for precision work or attach it to a power drill for better visibility while drilling. These combinations save space in your toolbox and make your DIY projects more convenient.
Note: Always ensure the combined tools are securely attached to avoid accidents during use.
Maintaining and Extending Flashlight Lifespan
Proper Cleaning and Storage
Taking care of your flashlight ensures it stays reliable when you need it most. Cleaning and storing it properly is a great place to start. Here’s how you can do it:
Store your flashlight in a cool, dry place. Extreme temperatures or moisture can damage its components.
Keep it out of direct sunlight to protect the materials and the batteries inside.
If you’re not using the flashlight for a while, remove the batteries to prevent leaks or corrosion.
When it comes to cleaning, a little effort goes a long way. Wipe the exterior with a dry or slightly damp cloth to remove dirt. Use a soft, lint-free cloth to clean the lens for a clear beam. Don’t forget to inspect the O-rings and replace them if needed. This keeps your flashlight waterproof and ready for action.
Tip: Lubricate the threads and O-rings every six months to keep everything running smoothly.
Battery Care and Replacement
Batteries are the heart of your flashlight, so taking care of them is essential. Start by avoiding overcharging. Use chargers with automatic shutoff features to prevent damage. Store batteries in moderate temperatures to keep them in good condition. Extreme heat or cold can shorten their lifespan.
Regular maintenance also helps. Clean the battery contacts to remove any dirt or corrosion. This ensures a steady flow of power. If your flashlight uses rechargeable batteries, charge them only when necessary. Overcharging or letting them drain completely can reduce their efficiency.
When it’s time to replace the batteries, choose high-quality ones. They last longer and perform better, especially in demanding situations.
Troubleshooting Common Flashlight Issues
Sometimes, your flashlight might not work as expected. Don’t worry—you can fix most issues with a few simple steps. Start by checking the batteries. Make sure they’re installed correctly and have enough charge. If the flashlight still doesn’t turn on, inspect the battery contacts for corrosion. Clean them gently with a dry cloth.
If the light flickers, the problem might be with the switch or the bulb. Test all the modes to see if they’re functioning properly. For waterproof flashlights, check the seals around the lens and tail cap. Damaged seals can let water in, causing malfunctions.
Note: If you notice dirt or foreign objects inside, disassemble the flashlight carefully to clean it.
By following these steps, you can keep your flashlight in top shape and ready for any task.
Flashlights are more than just tools for emergencies—they’re essential for precision, safety, and creativity in your DIY and home improvement projects. From focused lighting to illuminating hard-to-reach areas, they make every task easier. By organizing your flashlights and customizing them for specific needs, you’ll always have the right tool at hand.
The helius flashlight stands out as a reliable choice for your home projects. Its powerful beam and versatile features, like side lights with red and blue LEDs, make it perfect for everything from fixing appliances to camping trips. As one user shared:
"Never before has a flashlight exceeded my expectations like this one - it's amazingly bright, lightweight, and long-lasting!" - Joseph Thompson
Another user praised its durability and functionality:
"Great light! Thanks to Helius support for their prompt response to my problem. There was in fact no problem other than I didn't read the start instructions thoroughly. This is a great, very solid and compact flashlight with a super powerful beam which can be stepped down to a lower level when the high beam is required." - David Humphreys
So, whether you’re upgrading your workspace or preparing for emergencies, a dependable flashlight like the helius flashlight is a must-have for your home toolkit. Start applying these tips today and see how a simple flashlight can transform your projects!
FAQ
What makes LED flashlights better than traditional ones?
LED flashlights are brighter, more energy-efficient, and last longer than traditional ones. They also generate less heat, making them safer to use. Plus, their compact size and durability make them perfect for DIY projects and everyday tasks.
How can I build a DIY flashlight bracket?
You can create a DIY flashlight bracket using simple materials like wood or metal. Cut and shape the material to hold your flashlight securely. Attach it to a wall or workbench for easy access. This keeps your torch handy during projects.
Can I use a flashlight for outdoor DIY tasks?
Absolutely! Flashlights are great for outdoor tasks like fixing fences or setting up tents. Choose a waterproof and durable flashlight with LED technology for the best performance in outdoor conditions.
How do I maintain my flashlight for long-term use?
Store your flashlight in a cool, dry place. Clean it regularly and check the batteries for corrosion. Use rechargeable batteries for better efficiency. Inspect the lens and LED components to ensure they’re in good condition.
What’s the best way to customize a flashlight?
You can customize your flashlight by adding a magnetic base, glow-in-the-dark paint, or even a flexible neck attachment. These upgrades make it more versatile and tailored to your specific needs.
See Also
Essential LED Flashlights Every Home Should Have
Key Advice for Keeping Your Flashlight in Top Shape
A Complete Guide to Selecting Your Ideal Home Flashlight
